Help Center
Quick Start Panel
How to add Chatbot to Wordpress
Welcome to our Help Center, the one place to learn everything about building AI chatbots with EchowiseAI. Using our product, you can create a custom AI Agent chatbot trained on your content and integrated with 6000+ apps - without coding!
WordPress Installation Methods
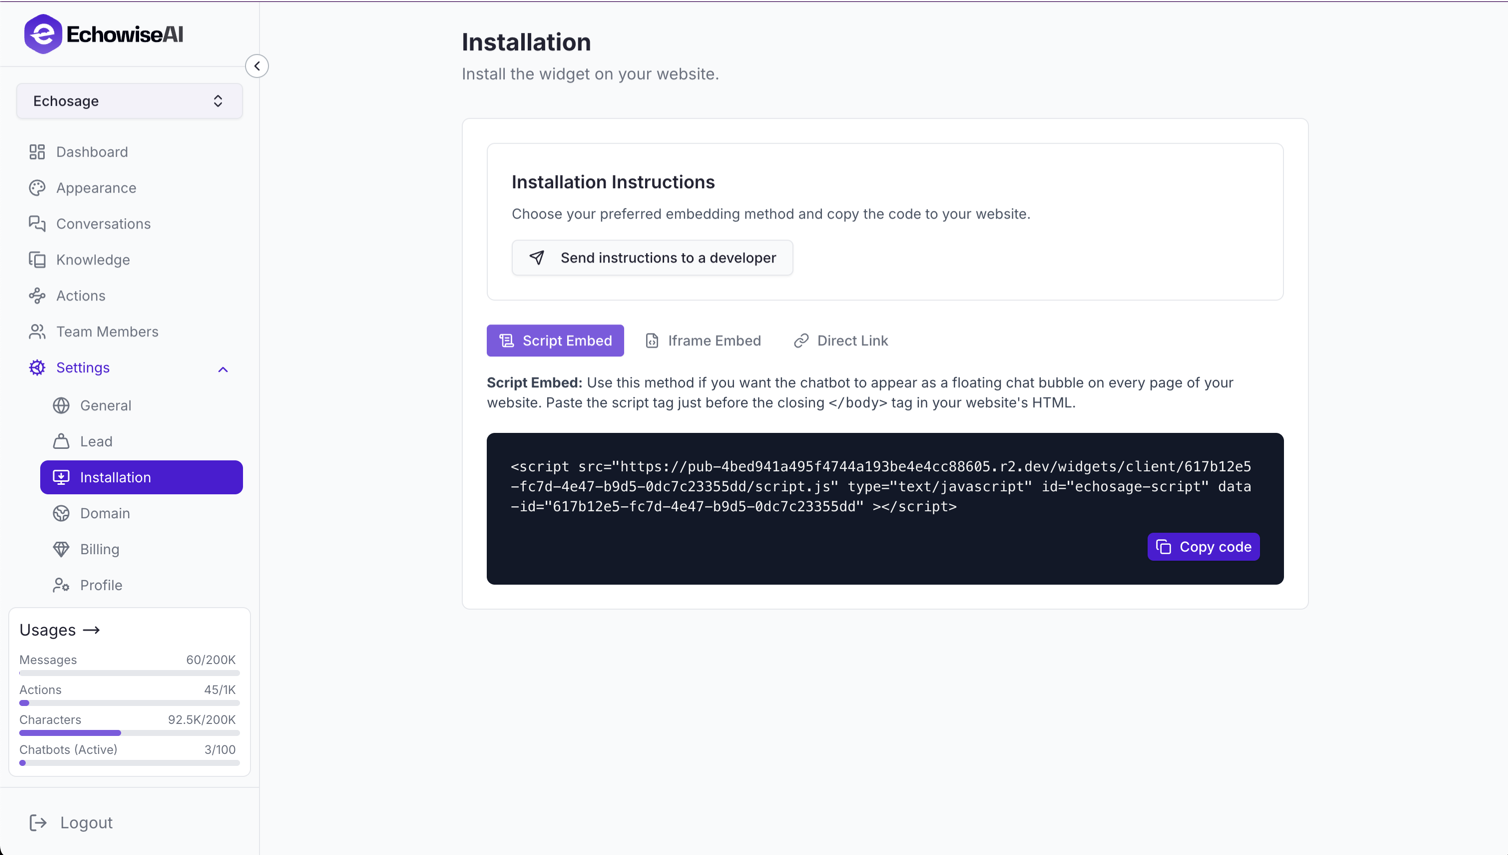
There are three main ways to add your EchowiseAI chatbot to your WordPress site. Choose the method that best fits your technical comfort level and requirements.
Method 1: Add Code to functions.php (Recommended for Developers)
This method gives you full control and is ideal if you're comfortable editing theme files. You'll add the chatbot code to your theme's functions.php file using WordPress hooks.
Step-by-Step Instructions:
- Access your WordPress admin panel
- Go to Appearance → Theme Editor
- Select functions.php from the right sidebar
- Add the following code at the end of the file:
// Add EchowiseAI Chatbot to WordPress
function add_echowiseai_chatbot() {
    // Your chatbot embed code here
    $chatbot_code = '<script src="https://cdn.echowiseai.com/widgets/client/617b12e5-fc7d-4e47-b9d5-0dc7c23355dd/script.js" type="text/javascript" id="echowiseai-script" data-id="617b12e5-fc7d-4e47-b9d5-0dc7c23355dd"></script>';

    // Add to footer
    echo $chatbot_code;
}
add_action('wp_footer', 'add_echowiseai_chatbot');

// Alternative: Add to header
function add_echowiseai_chatbot_header() {
    $chatbot_code = '<script src="https://cdn.echowiseai.com/widgets/client/617b12e5-fc7d-4e47-b9d5-0dc7c23355dd/script.js" type="text/javascript" id="echowiseai-script" data-id="617b12e5-fc7d-4e47-b9d5-0dc7c23355dd"></script>';
    echo $chatbot_code;
}
add_action('wp_head', 'add_echowiseai_chatbot_header');
Pro Tip: Replace YOUR_CHATBOT_URL with your actual chatbot embed URL from your EchowiseAI dashboard.
Method 2: Use Third-Party Header/Footer Plugin
Perfect for users who prefer a visual interface and don't want to edit theme files directly. Several WordPress plugins allow you to add custom JavaScript to your site's header or footer.
Recommended Plugins:
- Header and Footer Scripts - Simple and lightweight
- Code Snippets - Advanced code management
- Insert Headers and Footers - User-friendly interface
- Custom CSS and JS - Comprehensive customization
Installation Steps:
- Install and activate your chosen plugin from WordPress repository
- Go to the plugin settings in your WordPress admin
- Paste your chatbot embed code in the "Footer" section
- Save changes and test on your site
Method 3: Direct Embedding
The simplest method - just copy and paste your chatbot embed code directly into any post, page, or widget area.
Embedding Options:
- Pages/Posts: Use the HTML block in Gutenberg editor
- Widgets: Add to sidebar or footer using Text/HTML widget
- Shortcodes: Create a custom shortcode for easy reuse
<!-- Example: Add this to any HTML block or widget -->
<script src="YOUR_CHATBOT_URL"></script>
Creating a Custom Shortcode (Advanced)
For advanced users, you can create a custom shortcode that makes it easy to add your chatbot anywhere on your site.
// Add this to functions.php to create a shortcode
function echowiseai_chatbot_shortcode() {
    return '<script src="YOUR_CHATBOT_URL"></script>';
}
add_shortcode('echowiseai_chatbot', 'echowiseai_chatbot_shortcode');

// Usage: [echowiseai_chatbot]
Troubleshooting Common Issues
Common Problems and Solutions:
- Chatbot not appearing: Check if your theme has wp_head() and wp_footer() hooks
- JavaScript errors: Ensure no conflicting scripts or plugins
- Mobile issues: Test responsive behavior and touch interactions
- Performance issues: Consider lazy loading for better page speed